How to Fix a Dripping Tap in the UK: DIY Washer Swap vs Plumber Cost Breakdown
 By Harry Bennett
•
•
14 min read
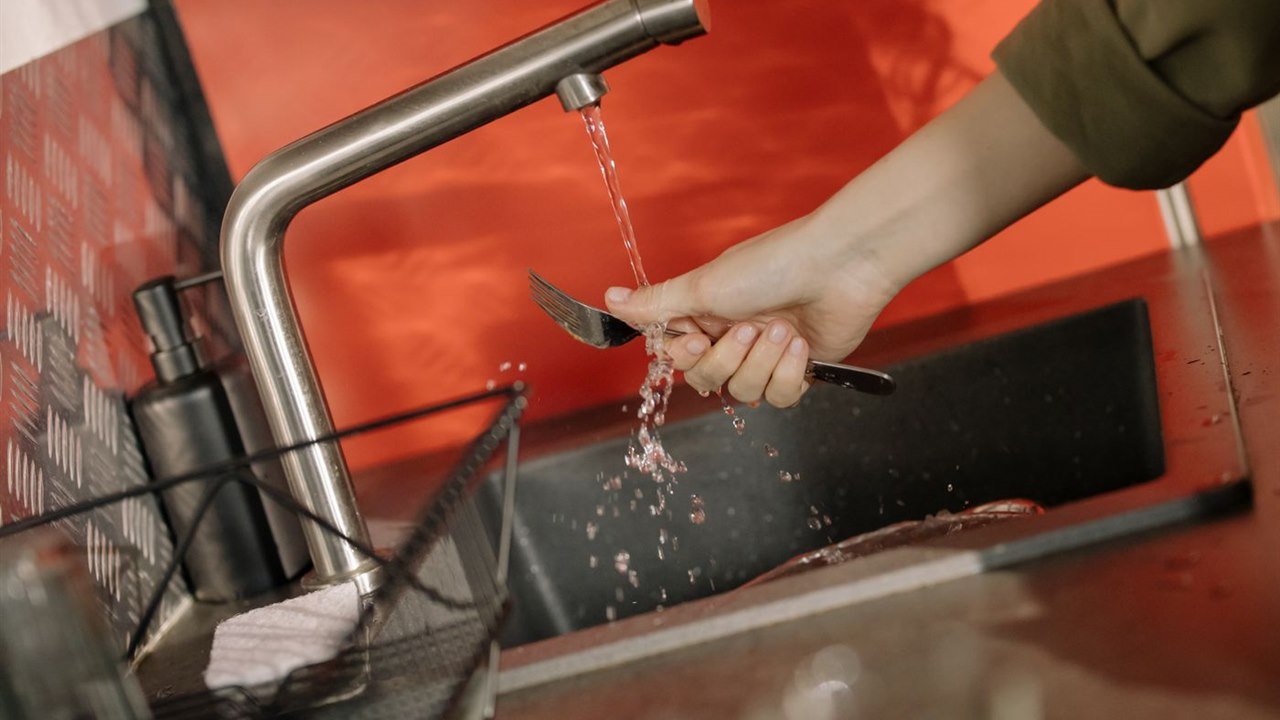
A kitchen or bathroom tap dripping just once every second wastes roughly 5,500 litres of mains water a year—adding £25 to £45 onto a metered UK water bill, plus extra gas or electricity charges if the hot tap is leaking. Yet the part causing that relentless midnight drip usually costs between £1.50 for a rubber jumper washer and £14 for a ceramic disc cartridge, compared with £95 to £185 to call a plumber in London or the South East.
Before reaching for a spanner—or dialling a local tradesperson—the secret to fixing a dripping UK tap first time is identifying which of the three British valve designs sits inside your tap body. Once you match the mechanism and isolate the water supply cleanly, most washer and cartridge swaps take 20 to 40 minutes with basic household tools.
Key Takeaways: Fixing a Dripping Tap in the UK
- Check how far the handle turns before buying parts: multiple full rotations mean a traditional rubber compression washer (£1.50–£3); a crisp 90-degree turn means a ceramic disc gland cartridge (£8–£18); a lift-and-swivel joystick uses a single-lever monobloc cartridge (£10–£22).
- Check UK BSP pipe thread sizes: British basin and kitchen sink valves are almost always ½-inch BSP, while bath taps are typically ¾-inch BSP—always carry the old cartridge to Screwfix, Toolstation, or a local plumbers’ merchant to match spline count and height exactly.
- Put the plug in the sink first: tiny brass grub screws and handle caps vanish straight down the waste trap in a split second if you leave the plug hole uncovered.
- DIY saves £75 to £160+ on simple valve swaps: however, if the tap body is lime-welded solid, the brass valve seat is deeply pitted, or the tap is over 12 years old with obsolete parts, replacing the entire tap (£45–£90 DIY or £150–£260 fitted) often makes better financial sense.
- Renters do not normally pay for worn tap washers: normal wear and tear on plumbing installations is a statutory landlord repair under Section 11 of the Landlord and Tenant Act 1985.
Step Zero: Identify Which of the 3 UK Tap Mechanisms You Own
Walking into B&Q and buying a generic packet of black rubber washers will do you zero good if your modern London flat has quarter-turn ceramic taps. Test the handle action right now—your tap falls into one of three distinct UK plumbing families:
| UK Tap Mechanism | How the Handle Moves | Internal Seal Part | Common UK Thread / Spec | DIY Part Cost | DIY Difficulty |
|---|---|---|---|---|---|
| Traditional Compression Pillar / Mixer Tap | Turns 2 to 4 full rotations from closed to full flow | Flat or dome rubber jumper washer + gland O-ring | ½” BSP (basin/kitchen) or ¾” BSP (bath) | £1.50–£4.00 (pack of washers) | Easy (20–30 mins) |
| Quarter-Turn Ceramic Disc Tap | Snaps smoothly exactly 90 degrees (¼ turn) | Brass ceramic disc gland valve (clockwise or anti-clockwise) | ½” or ¾” BSP; 20-spline or 24-spline brass stem | £8.00–£18.00 per valve | Easy–Moderate (25–40 mins) |
| Single-Lever Monobloc Mixer Tap | Lifts up/down for flow and swivels left/right for heat | Cylindrical plastic/ceramic monobloc cartridge | 35mm or 40mm diameter; flat or stepped locating pins | £10.00–£22.00 | Moderate (30–45 mins) |
| Spout Base / Swivel Leak (Not Spout Tip) | Drips from collar where spout joins body when tap is ON | EPDM rubber spout O-rings (usually two) | Model-specific O-ring kit + silicone grease | £3.00–£8.00 | Easy (15–25 mins) |
Notice that crucial fourth row: if water only seeps out around the base of a swivel kitchen spout while the tap is running, the main valve is fine—you simply need fresh spout O-rings and a dab of WRAS-approved silicone grease rather than a new cartridge.
DIY Cost vs UK Plumber Call-Out Breakdown (2026 Prices)
Should you tackle the repair yourself on a Saturday morning or book a local plumber? Plumbers in the UK typically charge a minimum first-hour call-out fee—around £75 to £105 outside London and £95 to £145 across Greater London in 2026—before parts and VAT. Because many modern ceramic cartridges are brand-specific, a plumber may also need to make a quick van run to City Plumbing, Wolseley, or Screwfix, nudging the job into a second hour.
| Repair Scenario | DIY Parts Cost | Extra DIY Tools (If None Owned) | Regional UK Plumber Cost (2026) | Greater London Plumber Cost (2026) | Verdict |
|---|---|---|---|---|---|
| Traditional rubber tap washer swap | £2–£4 | £10–£15 (adjustable spanner + screwdriver) | £80–£115 | £105–£150 | Huge DIY win (saves £75–£135) |
| Quarter-turn ceramic disc valve swap | £8–£18 | £12–£18 (spanner + hex keys) | £95–£140 | £125–£180 | Strong DIY win if valve unscrews cleanly |
| Single-lever monobloc cartridge swap | £10–£22 | £12–£18 (Allen keys + wide spanner) | £100–£155 | £130–£195 | Good DIY job once exact cartridge is matched |
| Full tap reviver kit (new valves + handles) | £18–£32 | £12–£18 | £110–£165 | £145–£210 | Great upgrade for worn traditional pillar taps |
| Replace entire kitchen or basin mixer tap | £45–£110 (new tap) | £15–£25 (box spanner / basin tap spanner + flexi tails) | £150–£230 (labour + standard tap) | £195–£310 (labour + standard tap) | Worth hiring a pro if pipe access is cramped or copper needs cutting |
Essential UK DIY Tool Kit Before You Turn Off the Water
Gather every tool onto a clean tea towel beside the sink before isolating the mains so you are not hunting in the shed with a dismantled tap:
- Medium adjustable spanner (200mm–250mm / 8–10 inch): opens wide enough for brass headgears and hexagonal valve bodies.
- Metric Allen key (hex key) set: most modern monobloc and lever taps hide a tiny 2mm, 2.5mm, or 3mm grub screw behind the handle or beneath the hot/cold index cap.
- Flathead and Pozidriv (PZ1/PZ2) screwdrivers: flathead for turning inline isolation valves and prising decorative indices; Pozidriv for top handle screws.
- Soft microfibre cloth or strips of electrical tape: wrap around chrome shrouds and nuts so spanner jaws never chew gouges into shiny finishes.
- Old washing-up bowl, towels, and sink plug: catches residual water inside the tap body and stops dropped grub screws disappearing down the U-bend.
- WRAS-approved silicone plumber’s grease & white vinegar: grease keeps fresh O-rings supple; vinegar dissolves hard-water crust locking chrome collars tight.
Step 1: Isolating Your UK Water Supply Safely (Without Flooding the Cupboard)
Never loosen a tap nut until you have confirmed zero water pressure reaches the spout. Depending on the age of your British plumbing, you will isolate the supply in one of two ways:
- Check beneath the sink for inline isolation (service) valves: Most kitchens and bathrooms plumbed since the late 1990s feature neat silver brass inline valves on the 15mm copper or braided flexi feeds directly under the sink. Insert a sturdy, well-fitting flathead screwdriver into the valve slot and rotate it 90 degrees so the slot sits perpendicular (across) the pipe. On mixer taps, isolate both hot and cold feeds—even if only the hot side seems to drip, back-feed through the mixer body can otherwise spray across your face.
- No local service valves? Shut the main internal stopcock: Turn your main internal brass stopcock clockwise until closed (see our UK winter home maintenance checklist for tips on locating and freeing stiff stopcocks safely). For a combi boiler, closing the mains cold stopcock stops both hot and cold taps immediately. If your house has a traditional hot-water cylinder in the airing cupboard fed from a loft cistern, turning off the mains stopcock stops cold kitchen taps only—you must also locate and close the red-wheeled brass gate valve feeding the cylinder (or tie up the loft tank ballcock and drain the hot pipes through a downstairs tap).
- Test and drain the tap: Open the dripping tap fully—water should spurt briefly and taper to nothing within seconds. Put the plug firmly into the sink plug hole and lay a folded towel over the ceramic basin to protect the glaze from dropped spanners.
Step 2A: How to Replace a Washer on a Traditional UK Compression Tap
If your tap turns several rotations from shut to open, follow this classic seven-step washer swap:
- Remove the handle cover and screw: Flick off the plastic “H” or “C” index cap on top of the tap head using a thin butter knife or tiny flathead screwdriver. Unscrew the brass retaining screw underneath and lift the tap handle straight off the splined shaft. (On crosshead vintage taps, look for a side grub screw instead.)
- Unscrew the decorative chrome shroud: Most traditional pillar taps hide the brass headgear beneath a rounded chrome bell shroud. Twist it anticlockwise by hand (wrap a rubber washing-up glove around it for extra grip). If limescale has glued it tight, wrap a vinegar-soaked kitchen towel around the threads for 15 minutes rather than mangling it with steel grips.
- Unscrew the brass valve headgear: Fit your adjustable spanner snugly onto the large hexagonal nut on the brass valve body. Grip the main tap spout firmly with your free hand so you do not twist the whole tap loose from the basin, and turn the spanner anticlockwise to unscrew the brass assembly.
- Swap the perished rubber washer: Flip the brass headgear upside down. At the bottom sits a flat or domed black rubber washer (13mm / ½” for sinks; 19mm / ¾” for baths), either pushed over a brass peg or held by a tiny brass nut. Pry off the flattened, grooved old washer (undoing the little brass retaining nut gently if present) and fit an identical new EPDM rubber washer.
- Inspect the internal brass valve seat inside the tap body: Shine your phone torch straight down into the open tap barrel. Run a clean fingertip lightly around the raised circular brass ring (the valve seat). It should feel glass-smooth. If you feel sharp nicks, chalky scale ridges, or crescent pitting caused by hard water, a fresh rubber washer alone will start dripping again within weeks—you will need either a £12 manual tap reseating cutter (which shaves the brass ring flat again) or a £15 screw-in ceramic tap reviver kit.
- Reassemble cleanly: Wipe away loose limescale flakes inside the body, smear a tiny trace of silicone grease onto the headgear threads and rubber O-ring, screw the valve headgear back in firmly (snug, not brute-forced), refit the shroud and handle, and snap the index cap back on.
- Restore water slowly and test: Ensure the tap handle is turned off, slowly open the isolation valve or stopcock, run the tap for 30 seconds to purge air bubbles, turn off gently, and inspect for 5 minutes to confirm a bone-dry spout and collar.
Step 2B: Replacing a Quarter-Turn Ceramic Disc Valve or Monobloc Cartridge
Modern UK flats overwhelmingly use ceramic disc technology—two diamond-hard polished ceramic plates that slide past each other cleanly without rubber compression washers. When grit or London limescale scores those plates, you replace the sealed cartridge as one unit.
For Quarter-Turn Twin-Handle Ceramic Taps
- Find the hidden grub screw or top screw: Check the rear or underside of the lever handle for a small rubber bung hiding a 2.5mm Allen grub screw (or pop the top index cap). Loosen the grub screw—you rarely need to remove it completely—and pull the lever cleanly off the brass spline.
- Unscrew the chrome collar and extract the brass ceramic gland: Twist the decorative collar off by hand, then undo the brass cartridge anticlockwise with your adjustable spanner while steadying the tap body.
- Match FOUR exact measurements before buying: Take the old cartridge directly to a plumbers’ merchant, Screwfix, or Toolstation (or measure accurately with a ruler/calliper). You must match: (a) thread size (½” vs ¾” BSP), (b) overall length (commonly 42mm–56mm), (c) spline count and diameter (most UK brass valves use 20 splines on a 7.6mm shaft, though Bristan, Grohe, and Franke occasionally use 18, 24, or 28 splines), and (d) opening direction (clockwise vs anticlockwise—often colour-coded with a red or blue bottom silicone seal).
- Fit and test: Flush any loose scale particles out of the seat, screw the replacement ceramic gland hand-tight plus a firm quarter-turn with the spanner, refit the lever in the exact horizontal closed position, tighten the grub screw, and restore water pressure.
For Single-Lever Monobloc Mixer Taps
- Pop the red/blue indicator button beneath the lever handle using a fine blade and loosen the internal Allen grub screw to lift the joystick lever clear.
- Remove the dome cover and brass locking nut: Unscrew the rounded chrome dome collar anticlockwise by hand, revealing a large flat-sided brass retaining nut (usually 30mm–42mm across). Undo this nut with a wide adjustable spanner or slip-joint pliers wrapped in cloth.
- Lift out the plastic/ceramic cartridge: Pull the cylindrical cartridge straight upwards, noting how the two tiny plastic locating pins on its underside drop into matching blind holes inside the brass tap base.
- Match diameter and base profile exactly: Most UK monobloc cartridges measure 35mm or 40mm wide with either a flat base or distributor-pin base. Clean the brass chamber thoroughly, align the new cartridge’s locating pins securely so it cannot spin, tighten the retaining nut snugly (do not crush the plastic housing—too tight makes the lever stiff; too loose leaks around the handle), reassemble, and test both hot and cold extremes.
Why London and South East Hard Water Destroys Taps Twice as Fast
If you live in London, Kent, Essex, Hertfordshire, or Hampshire, mains water hardness frequently exceeds 250–300 mg/l of dissolved calcium carbonate. Every time hot water passes through a kitchen mixer tap, microscopic chalk crystals precipitate directly onto rubber seals, ceramic discs, and brass valve seats—acting like fine sandpaper whenever you turn the handle.
Simple preventative habits dramatically lengthen cartridge life: unscrew and descale tap aerator nozzles every six months using warm white vinegar or citric acid—see our guide on removing limescale from UK taps and shower glass—and apply the same gentle descaling routine you use when descaling a kettle in hard London water. Avoid cranking traditional compression taps shut with maximum wrist strength; over-tightening crushes rubber washers flat in half their normal lifespan.
Troubleshooting 5 Common Snags Mid-Repair
- The tap still drips after swapping the washer or cartridge: On a twin-handle mixer tap sharing one spout, you may have fixed the cold side while the hot side was actually weeping—feel the drip temperature or isolate hot and cold separately to identify the true culprit. On compression taps, inspect for a scored brass valve seat or check whether the new rubber washer is slightly too thin.
- The chrome shroud or headgear refuses to budge: Hard water welds brass and chrome threads together. Soak a kitchen cloth in warm white vinegar, wrap it tightly around the joint for 30 minutes, gently tap the flats of the brass nut with a spanner handle to crack the calcium bond, and try again. If a single-lever tap is corroded solid after 15 years, stop before snapping copper pipes underneath—replacing the complete tap is cleaner and safer.
- The inline isolation valve leaks slightly from its screwdriver slot after closing: Older cheap brass service valves occasionally weep a slow drop from their O-ring once disturbed. Wrap a dry cloth underneath while working; if it continues weeping once turned fully open again, fit a £3 brass compression blanking cap temporarily or replace the £4 isolation valve.
- Water drips only while the combi boiler heats hot water (or from a vented boiler/tank): Occasional brief drips on an unvented hot-water system can signal rising thermal expansion pressure rather than a ruined tap—if multiple taps weep simultaneously when the water heats, call a qualified plumber to check the expansion vessel and pressure-reducing valve.
- Your tap uses an obscure unbranded cartridge nobody stocks: Check UK specialist online suppliers such as TapSparesUK or Divapor using a photo and millimetre measurements—or weigh £25+ postage for a rare cartridge against £55 for a brand-new WRAS-approved Bristan, Grohe, or Screwfix Flomasta tap with a five-year warranty.
UK Safety, Plumbing & Tenant/Landlord Responsibility Note
Protect your pipework and electrics: Always verify that the water has completely stopped before loosening any brass valve headgear—unscrewing a live mains-pressure cartridge sprays cold water across sockets and kitchen cabinets instantaneously. Never force a seized main stopcock or corroded under-sink copper pipe; call a qualified UK plumber (ideally CIPHE or WaterSafe registered) if joints flex or show green verdigris corrosion.
If you rent your property: Repairing a dripping tap caused by worn washers or ceramic cartridges falls squarely under your landlord’s statutory repairing duty under Section 11 of the Landlord and Tenant Act 1985. Do not dismantle landlord-owned taps without written permission in case a corroded pipe snaps—email your agent with a short video of the drip straight away. Review our full guide to UK landlord vs tenant repair responsibilities if an agent claims tap washers are your bill.
Frequently Asked Questions
How much does a plumber charge to fix a dripping tap in the UK in 2026?
Expect to pay £80 to £140 outside London and £105 to £195 in Greater London for a plumber to replace a tap washer or ceramic disc cartridge, including first-hour call-out labour and parts. Replacing an entire kitchen or basin mixer tap typically runs £150 to £310 depending on tap choice and under-sink access.
How much water and money does one dripping tap actually waste per year?
A steady drip of one drop per second wastes roughly 15 litres per day—around 5,500 litres every year. On a metered UK water and sewerage tariff (around £4 to £6 per cubic metre combined depending on region), that adds £25 to £45 annually for cold water, plus £15 to £35 extra in gas or electricity if the hot tap is dripping.
Do quarter-turn ceramic taps have a rubber washer I can replace?
No—not in the traditional compression sense. Quarter-turn taps seal using two ground ceramic discs sealed inside a brass cartridge (gland). While there is a small silicone compression gasket at the bottom of the cartridge, a dripping spout almost always means scored ceramic plates, requiring a complete £8–£18 replacement brass cartridge.
Why does my mixer tap drip even after I changed the cold cartridge?
Because hot and cold water share a single spout on a mixer tap, it is easy to swap the wrong side. Turn off the cold inline isolation valve underneath the sink and wait 10 minutes: if the spout keeps dripping, the leak is coming from the hot cartridge (or vice versa). On older taps, replacing both hot and cold cartridges together saves doing the job twice.
Can I turn off just the kitchen tap water without shutting off the whole house?
Yes—look inside the cupboard beneath your sink for small silver brass inline isolation valves fitted into the hot and cold supply pipes. Turning the flathead screw slot 90 degrees across the pipe cuts off just that tap while keeping toilets and showers elsewhere in the home working normally.
When is it cheaper to replace the whole tap instead of repairing it?
Consider replacing the entire tap if the chrome finish is peeling, the brass headgear is lime-welded solid, the internal valve seat is heavily corroded, or an obscure brand cartridge costs over £35 with postage. A new WRAS-approved UK kitchen or basin mixer starts around £45–£75 and comes with fresh braided flexi tails and a multi-year warranty.
Can I fix a dripping tap if I live in a rented flat?
You should report it to your landlord or letting agent first rather than dismantling it yourself. Worn tap washers and cartridges are standard landlord maintenance under UK housing law, and attempting DIY plumbing without consent can leave you liable if a stiff under-sink isolation valve or pipe joint leaks.
About Harry Bennett
Harry is the editorial lead at London Homecare, researching practical home maintenance, damp prevention, laundry care, and energy-saving solutions tailored to UK flats, terraced houses, and British weather conditions.