How to Remove and Replace Mouldy Silicone Sealant Around a UK Bath or Shower
 By Harry Bennett
•
•
14 min read
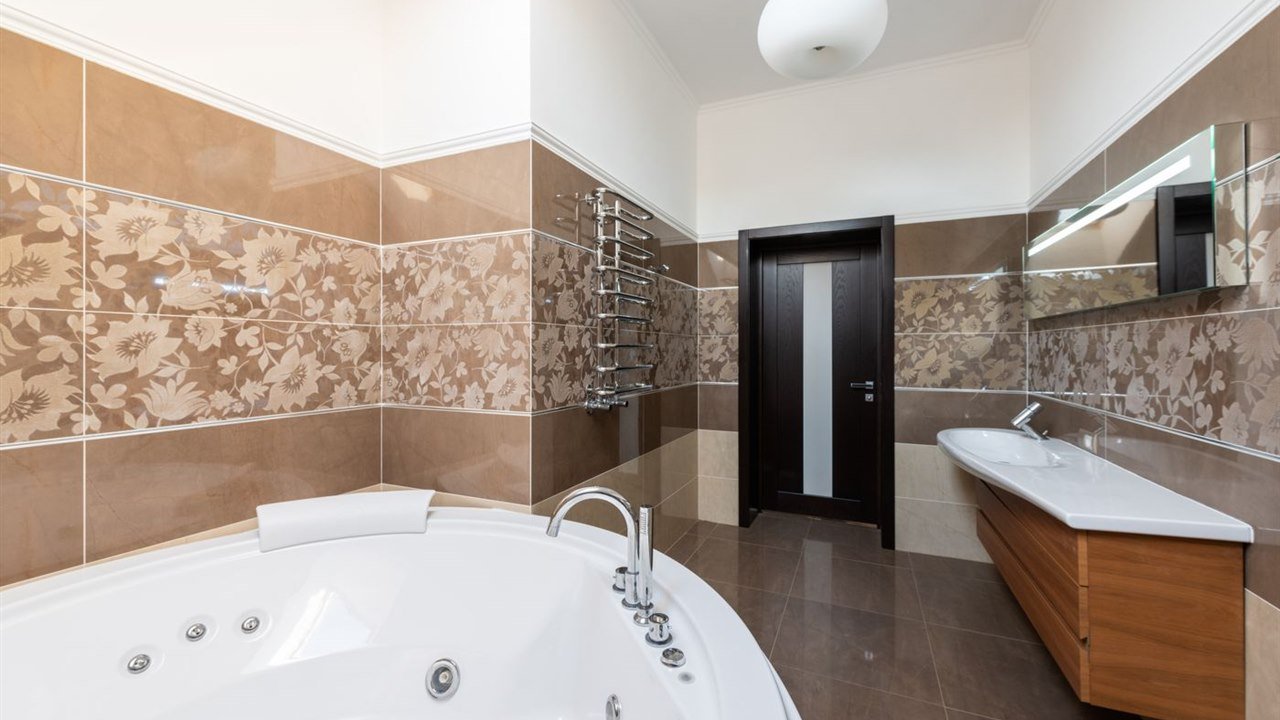
Once black mould penetrates inside bathroom silicone sealant, no amount of bleach spray, bicarbonate paste, or scrubbing will make it permanently white again—the fungal hyphae have rooted right through the rubber matrix. Worse still, brittle, shrinking, or peeling sealant around a UK acrylic bath or shower tray lets bathwater trickle silently behind tiles, rotting wooden floorboards and staining the kitchen ceiling directly underneath.
Replacing mouldy bathroom silicone yourself takes around 90 minutes of hands-on work plus 24 hours of curing time, costs £22 to £38 in trade-grade UK materials, and saves £100 to £185 compared with hiring a London mastic specialist or handyman. Follow the exact trade sequence below—including the crucial step of weighing down an acrylic bath with water and sealing only the outside of shower screen frames—to achieve a crisp, watertight bead that stays mould-free for five to ten years.
Key Takeaways: Replacing Bathroom Silicone Sealant Properly
- Never apply new silicone over old silicone: fresh sealant will not chemically bond to cured silicone; it peels away within months and traps active mould spores underneath.
- Fill acrylic baths with cold water before sealing: British acrylic tubs flex downwards by 2mm–4mm when full. Weighing the bath down before gunning the bead prevents the fresh seal tearing loose the first time someone takes a bath.
- Buy BS EN 15651-3 (XS1) trade sanitary silicone, never decorator’s caulk: decorator’s acrylic caulk dissolves in wet areas, while cheap £3 DIY sealants lack strong fungicides and turn black within six months.
- Degrease with methylated spirits, not white spirit: white spirit leaves an oily film that ruins adhesion; methylated spirits or isopropyl alcohol evaporates residue-free.
- Seal the outside of shower screen channels only: sealing the inside bottom edge traps water inside the aluminium frame and forces leaks out across your bathroom floor.
Why Bathroom Silicone Turns Black, Shrinks and Splits in UK Homes
Understanding why your old bath seal failed ensures you do not repeat the same mistake. Across British flats and Victorian conversions, premature silicone failure almost always traces back to four avoidable culprits:
- Bath flex and timber floor movement: Most modern UK bathrooms feature thermoformed acrylic baths resting on adjustable steel legs over suspended tongue-and-groove floorboards or chipboard. When filled with 120 litres of water plus an adult’s weight, the rim drops slightly. If the original fitter sealed the tub empty, every bath stretches the bead like an elastic band until it tears clean off the tile glaze.
- Wrong sealant type (or decorator’s caulk): In Britain, “caulk” refers strictly to water-based acrylic decorator’s filler used on skirting boards and door architraves before painting. It is completely unsuited to wet zones—yet landlords and hurried DIYers routinely run acrylic caulk along bath ledges, where it swells, cracks, and goes grey within weeks.
- Soap residue and poor room ventilation: Shampoo, shower gel, body oils, and hard-water scum collect on flat or concave silicone beads, creating a nutrient-rich layer where airborne mould spores germinate whenever bathroom humidity stays high.
- Over-use of household bleach: Pouring neat thick bleach along silicone week after week gradually breaks down the factory-added anti-fungal agents (biocides) inside the silicone rubber, leaving it porous and making mould return twice as fast.
Choosing the Best UK Sanitary Silicone: Acetoxy vs Neutral Cure Explained
Walk into Screwfix, Toolstation, Wickes, or B&Q and you will face forty nearly identical white tubes. Picking the right chemical grade takes thirty seconds once you decode two labels on the cartridge:
- Sanitary Grade (BS EN 15651-3, Class XS1): Look specifically for “Sanitary” and the European/UK standard XS1 (the highest microbiological resistance rating against mould growth). General-purpose glazing silicone contains zero fungicide and will blacken rapidly in a damp British bathroom.
- Acetoxy Cure vs Neutral Cure: Traditional trade favourites like Dow 785+ and Everbuild Forever White are acetoxy silicones—you recognise them instantly by their sharp vinegar smell (acetic acid) while curing. Acetoxy adheres brilliantly to ceramic tiles, porcelain, glass, and acrylic baths. However, if your bathroom has natural stone tiles (marble, travertine, limestone, or slate), unlacquered brass, or mirror edges, acetic acid reacts chemically and etches or discolours the stone. In those bathrooms, always select a neutral-cure (alkoxy/oxime) sanitary silicone or MS-polymer hybrid like CT1.
| UK Trade Silicone Brand | Cure Chemistry | Best Bathroom Application | Mould Protection | Typical UK Price (310ml, 2026) |
|---|---|---|---|---|
| Dow 785+ Sanitary (formerly Dow Corning) | Acetoxy (high-modulus) | Ceramic/porcelain tiles, acrylic & steel baths, glass screens | XS1 trade-grade fungicide (industry benchmark) | £8.50–£11.50 |
| Mapei Mapesil AC | Acetoxy (solvent-free) | Colour-matched ceramic/porcelain joints (30+ colours) | BioBlock mould-resistant technology | £9.50–£13.00 |
| Everbuild Forever White (Sika) | Acetoxy sanitary | Everyday family baths & showers with heavy condensation | Microban 10-year anti-mould guarantee | £8.00–£10.50 |
| Unibond Anti-Mould Sanitary | Acetoxy (triple-protect) | Widely available high-street DIY bath/basin resealing | Strong fungicide; repels, kills & prevents spores | £9.00–£12.00 |
| Mapei Mapesil LM / Dow 785 Neutral | Neutral cure (low-modulus) | Marble, travertine, limestone, mirrors, & sensitive metals | XS1 sanitary fungicide; zero acid etching | £11.00–£15.50 |
| CT1 Sealant & Construction Adhesive | Tribrid / MS-polymer | Problem leaks, damp substrates, wet-room trays & stone | Anti-fungal; bonds even on slightly damp surfaces | £13.50–£16.50 |
Check the use-by date stamped on the tube shoulder or plunger base before paying. Expired silicone (older than 12–18 months from manufacture) refuses to cure properly and stays sticky indefinitely—a surprisingly common trap with slow-moving colours like Manhattan Grey or Jasmine.
Complete UK Tool List and DIY vs Mastic Specialist Cost Breakdown
A smooth, razor-straight bathroom joint relies far more on £12 worth of proper prep and shaping tools than on steady artistic hands. Avoid the flimsy £3 tin caulking guns that flex and keep oozing sealant after you release the trigger—a £9–£14 heavy-duty drip-free skeleton gun makes controlling flow effortless.
| Item / Service | UK Hardware Spec | DIY Cost (2026) | Pro Mastic Man / Handyman Cost |
|---|---|---|---|
| Trade sanitary silicone (310ml cartridge) | Dow 785+ / Forever White / Mapei AC | £8.50–£13.00 | Included in trade rate |
| Heavy-duty non-drip sealant gun | 12:1 thrust ratio steel skeleton gun | £9.00–£14.00 | Pro owns |
| Silicone removal & profiling kit | Plastic blade scraper + Cramer Fugi rubber profile set | £6.00–£12.00 | Pro owns |
| Chemical silicone residue remover gel | HG Silicone Seal Remover or No Nonsense gel | £5.50–£8.50 | Included if needed |
| Methylated spirits / isopropyl alcohol + cloths | 500ml bottle + lint-free microfibre/kitchen roll | £4.00–£6.00 | Included |
| Low-tack masking tape (optional) | 25mm yellow/blue FrogTape or ScotchBlue | £4.50–£6.50 | Pros rarely tape (use Cramer tools) |
| Total Cost (1 Bath + 1 Basin / Shower) | Complete removal, prep & reseal | £22–£38 (first time) / £10 repeat | £95–£150 regional / £130–£185 London |
Step-by-Step Guide: How to Remove and Replace Bathroom Silicone Like a Pro
Set aside an uninterrupted morning or Saturday afternoon when nobody needs to use the bath or shower for the next 24 hours. Work through these nine steps in strict order—rushing preparation is the single reason DIY seals fail early.
Step 1: Dry the Bathroom Completely and Check for Hidden Water Damage
Do not attempt to reseal a shower an hour after someone stepped out of it. Run the extractor fan, open the window, and let the tiles and grout dry for at least 12 hours (overnight is ideal). Before picking up a knife, press firmly along the bottom row of wall tiles directly above the bath rim. If tiles flex, sound hollow when tapped with your knuckle, or weep dark water when pressed, the plasterboard behind them is already sodden—sealing over wet, blown plasterboard traps moisture inside the wall. Let the wall dry thoroughly with a dehumidifier or fan heater first, or call a tiler to replace damaged backing board with waterproof tile backer board.
Step 2: Strip Every Millimetre of Old Silicone Cleanly
Remove the bulk of the old bead using a sharp retractable Stanley knife or a purpose-made silicone removal tool. Slice neatly along the top edge (against the tile) and the bottom edge (against the bath or tray), then hook an end up and pull the continuous rubber strip away.
Crucial protection tip for acrylic baths and shower trays: never scrape metal razor blades flat across glossy acrylic—one slip leaves a permanent white scratch that collects dirt forever. Use a metal window scraper strictly on glazed ceramic/porcelain tiles, and switch to a hard plastic silicone scraper on acrylic surfaces. Once the thick strip is gone, brush chemical silicone remover gel (such as HG or Screwfix No Nonsense Silicone Eater) along the stubborn invisible film left behind, wait 20–30 minutes as directed, and wipe completely clean with dry kitchen roll. Check with dry fingertips—if the tile or bath rim still feels slightly rubbery, repeat the gel step.
Step 3: Kill Remaining Mould Spores, Descale and Degrease
Once the bare joint gap is exposed, you will often see black mould embedded in the dark shadow gap behind the old sealant alongside chalky hard-water deposits. Clean chalky scale off neighbouring tiles and shower edges first—see our guide on removing stubborn limescale from UK shower glass and taps—and spray a UK fungicidal wash into the exposed gap to neutralise lingering spores, wiping dry after 15 minutes.
Finally, dampen a clean lint-free cloth with methylated spirits or 70%+ isopropyl alcohol and wipe both the tile face and bath rim vigorously to strip invisible silicone oils and soap film. Never use white spirit (which leaves a greasy petroleum residue) and never leave puddles of water inside the crevice—blow a hairdryer on warm along the joint for two minutes until bone dry.
Step 4: Fill an Acrylic Bath Halfway to Two-Thirds with Cold Water
If you are resealing a plastic/acrylic bath, insert the plug and run cold water (hot water creates steam and condensation on cold tiles, ruining adhesion) until the tub is roughly half to two-thirds full—around 100kg of weight. Notice how the gap between the bath rim and bottom tiles opens up by 1mm to 3mm. By applying silicone while the bath is weighted down, the cured bead sits comfortably under light compression when empty and neutral tension when full, instead of ripping apart under load. Leave the water in the tub for the full 24-hour cure before pulling the plug. (You can skip filling heavy cast-iron baths, stone-resin shower trays, or vanity basins.)
Step 5: Tackle Wide Gaps and Decide on Masking Tape vs Profiling Tools
Check the gap width along the entire wall. Standard sanitary silicone bridges gaps up to 6mm–8mm comfortably. In older Victorian terraces with bowed plaster walls, gaps sometimes yawn to 10mm–15mm. Never try to fill a deep chasm purely with silicone—it shrinks excessively, sags, and takes days to cure. Instead, press a length of closed-cell foam backer rod (£4 online or at builders’ merchants) tightly into the gap first so the silicone spans cleanly across two surfaces rather than three.
Should you apply masking tape? For first-time DIYers, running two parallel strips of low-tack masking tape (one along the tile, one along the bath rim, spaced 6mm–8mm from the corner) guarantees straight borders—provided you pull the tape off immediately after tooling while the silicone is still wet. However, most professionals skip tape altogether because tape leaves a tiny vertical “lip” at the silicone edge that traps soapy water; instead, they rely on a Cramer Fugi silicone profiling tool (£8–£12) which cuts a feather-flat 45-degree bevel straight against the tile.
Step 6: Cut the Cartridge and Nozzle Cleanly
Cut the threaded tip off the cartridge just above the thread ring with a utility knife (or the cutter built into your gun handle), screw the plastic nozzle on tightly, and slice the nozzle tip cleanly at a 45-degree angle. Match the opening width to your gap plus 2mm—typically a 6mm to 8mm opening for a bath rim, or 4mm to 5mm for a neat hand basin or shower frame. Test a 10cm practice bead onto a scrap piece of cardboard first so you feel the trigger pressure before touching the bathroom.
Step 7: Apply One Steady, Continuous Bead
Always seal vertical tiled corners first (working from bottom to top or top to bottom in one uninterrupted motion), then seal the horizontal bath or tray perimeter. Hold the gun at roughly 45 degrees to the wall and 45 degrees along the joint, squeezing steadily while sliding the nozzle at a consistent walking pace. Whether you gently push the nozzle forward (preferred by many UK mastic specialists because it forces silicone deeply into the crevice) or pull smoothly backwards, aim to slightly overfill the corner rather than starving it—tooling removes clean excess, whereas thin voids leave pinholes for leaks.
Release the pressure thumb-lever at the rear of the skeleton gun the moment you reach a corner so sealant stops oozing immediately.
Step 8: Tool the Joint Properly (Why You Should Ditch the Soapy Finger Trick)
Every old UK DIY forum tells you to lick your thumb or dip your finger in Fairy washing-up liquid and drag it along the silicone. Professional mastic applicators strongly advise against doing this for two clear reasons:
- Skin bacteria and washing-up liquid undermine adhesion: if soapy water sneaks underneath the wet silicone edge before it bonds to the tile glaze, it breaks the waterproof seal invisibly—and household washing-up liquid leaves organic surfactants that actually encourage mould growth.
- Fingers create a hollow concave scoop: a round finger scoops too much silicone out of the middle, leaving paper-thin feathered wings that peel within months and a shallow trough where bathwater sits.
Instead, select the 6mm or 8mm 45-degree edge on a dry Cramer Fugi rubber profiling tool (kept beside a wad of kitchen roll to wipe collected excess every 30cm). Place the tool squarely at the corner with firm, even pressure against both tile and bath, and glide steadily along the length in one clean sweep. The silicone forms a sharp, sloping triangular bead that sheds shower water instantly. If you used masking tape, peel it gently backwards at 45 degrees immediately within two minutes of tooling before a skin forms, then give the edge one feather-light pass with the profiling tool to flatten any tiny ridge.
Step 9: Cure Undisturbed for a Full 24 Hours
Acetoxy silicone skins over in 10 to 20 minutes, which tempts households into showering the same evening. Do not rush it. Deep full-depth cross-linking takes 24 hours (up to 48 hours on extra-wide beads in cold, unheated bathrooms). Keep the bathroom door slightly ajar for ventilation, avoid splashing the bead, and wait a full 24 hours before draining your weighted acrylic bath or taking a hot shower.
Tricky UK Bathroom Scenarios & Troubleshooting
How to Seal a Shower Enclosure Without Causing a Hidden Leak
This catches out thousands of UK homeowners every year. When resealing a glass quadrant, pivot, or sliding shower enclosure, seal the vertical wall channels and the bottom track on the OUTSIDE of the shower ONLY. Never run a bead of silicone along the inside bottom joint between the aluminium frame and the shower tray.
Why? Shower doors splash water into the upright metal wall profiles and track mitres. Manufacturers intentionally design the unsealed inside bottom gap as a weep drainage path so trapped frame water runs harmlessly back into the shower tray. If you seal the inside bottom edge, trapped water fills the aluminium frame, seeps past wall-plug screw holes behind your tiles, or bursts out across the bathroom floor.
Stopping Mould Returning Around the Whole Bathroom
Even the finest Dow 785+ silicone will eventually discolour if your bathroom stays dripping wet every day. Keep a £4 rubber window squeegee hanging inside the shower to swipe wall tiles and the bath ledge dry in 20 seconds after bathing, run your extractor fan for at least 15–20 minutes post-shower, and follow a monthly maintenance routine—our deep-clean London flat checklist includes a fast bathroom wipe-down system that prevents soap scum build-up. If dark spots are also creeping across painted bathroom ceilings or adjoining bedroom plaster, tackle the airborne moisture source using our guide to removing black mould from walls safely.
What If You Smudge the Wet Bead Mid-Job?
Resist the urge to poke or dab a smeared bead with tissues once it starts to skin (after about 5 minutes)—you will only drag sticky strings across your tiles. Either immediately wipe the entire spoiled section off cleanly with dry kitchen roll and methylated spirits while wet and re-run that single wall edge, or leave it to cure fully for 24 hours and neatly trim a tiny stray smear off glazed tile with a fresh razor blade.
Safety, Ventilation & UK Tenant/Landlord Responsibility Note
Fumes and sharp blades: Acetoxy sanitary silicone releases strong acetic acid vapours while curing, and methylated spirits is highly flammable. Keep windows open and the extractor fan running, wear nitrile gloves and eye protection when handling chemical silicone remover gels, and always retract Stanley blades between cuts.
Renting a flat or house in the UK? Perished, split, or heavily mouldy bath silicone risking subfloor water damage is normally your landlord’s maintenance responsibility—not a job tenants should gamble their deposit on attempting without written permission. Report failing seals by email with clear photos straight away so you cannot be blamed for downstairs ceiling leaks. Read our full breakdown of UK landlord vs tenant repair responsibilities before picking up a sealant gun in a rented bathroom.
Frequently Asked Questions
Can I put new silicone sealant directly over old mouldy bath silicone?
No. Fresh silicone will not bond reliably to cured silicone—it forms a weak skin that peels off within months, trapping dampness and living mould spores underneath where they keep spreading. Always strip 100% of the old sealant, treat spores, and degrease with methylated spirits before applying a fresh bead.
Why do plumbers fill the bath with water before applying silicone?
Modern UK acrylic baths flex downwards by 2mm to 4mm when filled with water and a bather’s weight. Filling the bath halfway to two-thirds with cold water pulls the tub down to its loaded position before you apply the bead, stopping the cured silicone from ripping away from the wall tiles the first time someone runs a bath.
What is the difference between decorator’s caulk and bathroom silicone in the UK?
In the UK, decorator’s caulk is a paintable, water-based acrylic filler made solely for dry woodwork like skirting boards and door frames—it softens, cracks, and fails quickly around baths or showers. Always use a 100% waterproof, flexible sanitary silicone rated BS EN 15651-3 (XS1) for wet bathroom joints.
How long should I wait after replacing silicone before taking a shower?
Wait a full 24 hours before running a shower or pulling the plug on a water-weighted bath. Although sanitary silicone feels dry to the touch after 20–30 minutes, the inner core cures at roughly 2mm to 3mm per 24 hours; early steam or water contact weakens adhesion and encourages pinholes.
How much does it cost to get a professional to re-seal a bath or shower in the UK?
Hiring a professional mastic applicator or handyman to strip old silicone, clean, and re-seal one standard bath or shower enclosure typically costs £95 to £150 outside London and £130 to £185 in Greater London in 2026. If you book a whole bathroom (bath, shower, basin, and toilet perimeter) in one visit, the per-item rate drops substantially.
Which silicone should I use on marble or natural stone bathroom tiles?
Always choose a neutral-cure sanitary silicone (such as Mapei Mapesil LM or Dow 785 Neutral) or a non-staining MS-polymer hybrid like CT1. Standard acetoxy silicone gives off acetic acid while curing, which reacts with calcite in marble, travertine, and limestone to cause permanent dull etching or yellow oil staining along tile edges.
How long should freshly applied trade bathroom silicone last before needing replacement?
When applied cleanly onto a bone-dry, degreased surface with a trade XS1 sanitary silicone like Dow 785+ or Everbuild Forever White—and wiped dry regularly with a squeegee—a well-tooled bath or shower bead typically lasts 5 to 10 years without turning black or losing its waterproof seal.
About Harry Bennett
Harry is the editorial lead at London Homecare, researching practical home maintenance, damp prevention, laundry care, and energy-saving solutions tailored to UK flats, terraced houses, and British weather conditions.