How to Clean and Descale a Dishwasher in Hard-Water UK Areas: The Step-by-Step Salt, Filter and Maintenance Routine
 By Harry Bennett
•
•
18 min read
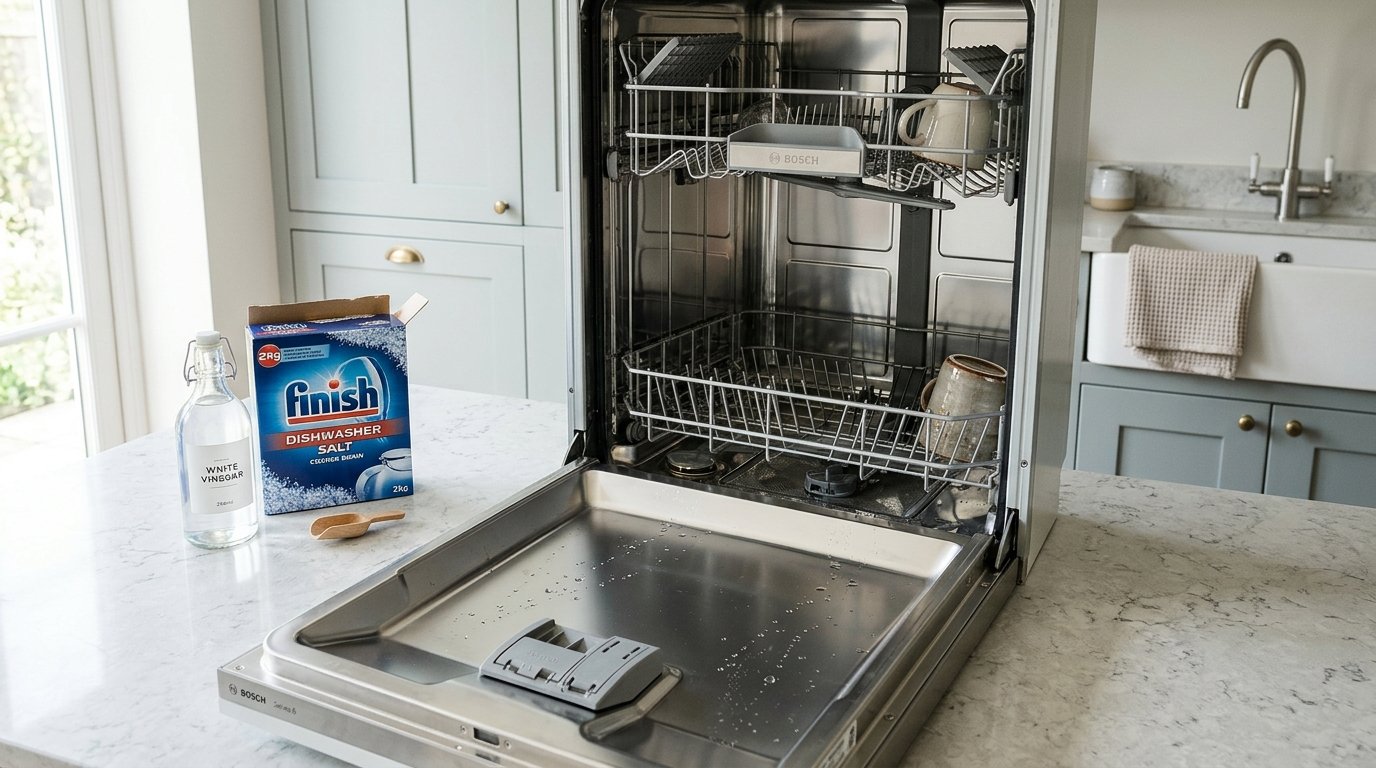
Living in London, the Home Counties, or anywhere across the South and East of England means dealing with some of the hardest tap water in the United Kingdom. Sourced predominantly from subterranean chalk and limestone aquifers, municipal water supplied by Thames Water, Affinity Water, and Southern Water routinely measures between 260 and 380 parts per million (ppm) of dissolved calcium and magnesium carbonate. While these dissolved minerals are harmless to human health, they are ruthless adversaries for domestic kitchen appliances.
In a dishwasher, water is heated up to 70°C. High temperatures force calcium bicarbonate to precipitate out of suspension as solid, insoluble calcium carbonate—the chalky, crystalline crust known as limescale. Within just three to six months in a hard-water postcode, limescale coats the heating elements, clogs the microscopic water jets inside the rotating spray arms, and glazes the interior stainless steel tub in a persistent milky film. Worse, rotting grease, stray food particles, and mineral slurry accumulate inside the cylindrical filter assembly at the base of the machine, creating stagnant odours and triggering drainage errors like the dreaded E24 or E25 pump fault.
Fortunately, restoring a sluggish, chalk-stained dishwasher to peak hydraulic and thermal efficiency does not require an expensive callout from a domestic appliance engineer. With an understanding of your machine’s internal water softening system, a methodical filter clearance routine, and a regular citric acid or vinegar descaling cycle, you can keep your appliance operating like new while safeguarding your crockery and glassware. This comprehensive guide details the exact step-by-step procedure tested and proven in London households.
Key Takeaways & Quick Action Rules
- Clean the Sump Filter Fortnightly: In hard-water areas, grease and calcium fuse into a cement-like paste inside the micro-mesh filter. Rinse it under warm running water using a soft nylon dish brush.
- Never Skip Dishwasher Salt: Even if you use premium “All-in-One” dishwasher tablets, the built-in ion-exchange water softener resin requires coarse dishwasher salt (pure sodium chloride) to regenerate. Set the mechanical dial or electronic setting according to your local water hardness.
- Inspect Spray-Arm Jet Nozzles Bi-Monthly: Limescale flecks break loose from heating elements and plug the spray tips. Use a wooden cocktail stick—never a metal pin or wire—to clear the openings without altering the spray geometry.
- Descaling Cycle Protocol: Run a bi-monthly empty maintenance wash on the highest temperature programme (65°C to 70°C) using 200g of food-grade citric acid crystals or 500ml of 5% white pickling vinegar placed in a glass bowl on the top rack.
- Differentiate Limescale from Glass Etching: A white haze that disappears when rubbed with a vinegar-soaked cloth is limescale deposit; a cloudy rainbow sheen that remains is permanent glass corrosion (etching) caused by excessively soft water or overheated wash cycles.
Dishwasher Cleaning & Maintenance Schedule for UK Hard-Water Homes
To prevent premature heating element burnout, pump strain, and smelly bacterial bio-slime, follow this structured maintenance calendar tailored to British water conditions:
| Maintenance Task | Recommended Frequency | Required Products / Tools | Average Cost (£) | Failure Prevented |
|---|---|---|---|---|
| Cylindrical Filter Rinse | Every 1 to 2 weeks | Warm tap water, dishwashing liquid, soft nylon brush | £0.02 | Standing sump water, foul odours, redeposited food grit |
| Lower & Upper Spray Arm Clearing | Every 4 to 6 weeks | Wooden cocktail sticks, warm water | £0.05 | Unwashed top-rack mugs, weak water pressure, blind wash spots |
| Dishwasher Salt Top-Up | Every 3 to 6 weeks (when indicator lights) | Coarse granular dishwasher salt (pure NaCl) | £1.50 per 2kg bag | Milky cloudy glassware, resin tank calcification, white chalk film |
| Hot Acid Descaling Cycle | Every 6 to 8 weeks | Food-grade citric acid (200g) or 500ml white vinegar | £0.70 – £1.20 | Heating element scale buildup, extended cycle duration, high kWh draw |
| Perimeter Door Gasket & Hinge Scrub | Monthly | Microfibre cloth, dilute washing-up liquid or vinegar | £0.05 | Black mould (Aspergillus niger) behind door bellows, door leaks |
| Drain Sump & Impeller Check | Quarterly or on slow drain | Torx T20 screwdriver (if fitted), sponge, rubber gloves | £0.00 | E24/E25 drainage fault codes, pump motor burnout (£160–£220 repair) |
Step 1: Removing and Deep-Cleaning the Triple Filter Assembly
At the bottom of every domestic dishwasher—underneath the lower crockery basket—sits the filtration system. In modern European appliances manufactured by Bosch, Neff, Siemens, Miele, Beko, and Hotpoint, this assembly consists of three interconnected components: a coarse plastic cylinder trap, an ultra-fine micro-mesh filter, and a flat stainless steel baseplate.
The primary function of this assembly is to capture rice grains, vegetable peelings, meat gristle, and grease before they can enter the recirculation pump or block the waste drainage hose. In hard-water areas, however, fatty grease combines with precipitated calcium carbonate to form a dense, waxy curd that seals the fine mesh openings, drastically reducing water flow during washing cycles.
Step-by-Step Filter Cleaning Protocol:
- Empty the Lower Basket: Slide the lower dish rack completely out of the machine and set it aside to provide clear, unrestricted access to the floor of the tub.
- Unlock the Cylindrical Filter: Grasp the top plastic rim of the central filter cylinder and rotate it counter-clockwise by roughly a quarter turn (usually indicated by alignment arrows). Pull the cylinder directly upwards.
- Separate the Component Layers: Most modern filters pull apart into two or three distinct sections. Separate the inner plastic core from the fine mesh outer sleeve, and lift out the flat perforated metal catchment plate beneath it.
- Rinse Away Coarse Debris: Hold the pieces under a hot kitchen tap, washing away loose food particles from the inside out so debris is flushed off rather than driven deeper into the fine nylon mesh.
- Degrease and Scrub: Apply a squirt of standard washing-up liquid and gently scrub the interior and exterior of the mesh cylinder using an old soft toothbrush or dish brush. Pay special attention to the fine seams where yellow grease and chalky scale collect. Crucial tip: Never use steel wool, scouring pads, or hard wire brushes, as these can easily tear the delicate nylon mesh, allowing solid debris into the drain impeller.
- Inspect the Sump Basin: Before reassembling, peer into the circular sump well at the base of the machine. Use a small sponge to soak up any murky standing water and inspect for broken glass fragments, lemon pips, chicken bones, or plastic twist-ties that may have dropped through.
- Reinsert and Lock Firmly: Seat the flat stainless steel plate into its depression, drop the cylinder assembly through the centre, and twist clockwise until you hear or feel a firm click. Ensure the alignment arrows meet; if the filter is loose, recirculated debris will bypass the mesh and immediately plug your spray arm nozzles.
For more flat cleaning routines, consult our Complete UK Flat Deep-Cleaning Checklist.
Step 2: Clearing Calcified Spray Arms and Nozzles
Your dishwasher relies on rotating water pressure to mechanically strip food and grease from your plates. Water is pumped up through the lower and upper spray arms, exiting through calibrated nozzles angled to spin the arms while throwing powerful jets upward and downward. When hard-water limescale builds up, tiny flecks break free from the internal pipework and become wedged inside these jet apertures.
When two or three nozzles clog on a spray arm, the arm stops spinning freely or leaves large blind spots inside the tub, resulting in tea-stained mugs on the top shelf and grimy plates at the corners of the lower basket.
How to Clear the Nozzles Properly:
- Remove the Lower Arm: On most machines (including Bosch and Beko), the lower spray arm simply pulls firmly straight up from its central spindle. Some models have a plastic bayonet locking ring beneath that requires a gentle twist.
- Remove the Upper Arm: The upper spray arm is mounted to the underside of the top dish rack. Look at the top connector; on most models, you rotate the knurled plastic retention nut clockwise to loosen and drop the arm down.
- Inspect Every Jet Hole: Hold the arm up to a bright kitchen light and look through each jet hole. You will often see chalky white plugs or tiny trapped seeds (such as sesame seeds, raspberry seeds, or lemon pulp) jammed tightly inside the opening.
- The Toothpick Extraction Method: Use a wooden cocktail stick or bamboo skewer to push the obstruction into the interior hollow of the arm. Never use sewing needles, unfolded paperclips, or steel nails: metal tools can deform, scratch, or enlarge the precisely engineered plastic nozzle holes, permanently ruining the water spray velocity.
- Flush Out Trapped Particles: Run a high-pressure stream of warm tap water into the central inlet hub of the arm while shaking it vigorously. Allow the water to escape through the nozzles, carrying the dislodged mineral chips out with it. Repeat until every jet flows freely.
- Descaling Heavily Calcified Arms: If an arm is encrusted in a thick layer of rock-hard limescale, submerge it overnight in a shallow basin filled with warm water and 250ml of white vinegar. The mild acid will gently dissolve the chalk without harming the plastic moulding.
Understanding UK Water Hardness: The Chemistry of Limescale
To operate a dishwasher efficiently in the United Kingdom, it helps to understand where your local water sits on the national hardness spectrum. Mineral content dictates not just how frequently you need to clean your appliance, but the exact salt dosage setting required by your internal ion-exchange water softener.
| UK Region & Primary Water Supplier | Hardness Classification | Calcium Carbonate (ppm / mg/L) | English Clark Degrees (°e) | Recommended Softener Dial Setting (1–6) | Salt Refill Frequency |
|---|---|---|---|---|---|
| London & Thames Valley (Thames Water) | Very Hard | 280 – 350 ppm | 20°e – 25°e | Level 5 or Level 6 (Max) | Every 3 to 4 weeks |
| Hertfordshire, Essex & Surrey (Affinity Water) | Extremely Hard | 310 – 390 ppm | 22°e – 27°e | Level 6 (Max) | Every 3 weeks |
| Kent & Sussex (Southern Water) | Hard to Very Hard | 250 – 320 ppm | 18°e – 22°e | Level 4 or Level 5 | Every 4 weeks |
| Midlands & East Anglia (Severn Trent / Anglian) | Hard | 220 – 290 ppm | 15°e – 20°e | Level 4 | Every 4 to 5 weeks |
| North West England (United Utilities) | Soft to Moderately Soft | 40 – 90 ppm | 3°e – 6°e | Level 1 or Level 2 | Every 8 to 12 weeks |
| Scotland & Northern Ireland (Scottish Water / NI Water) | Very Soft (Granite / Moorland) | 20 – 50 ppm | 1°e – 4°e | Level 1 (or Off) | Every 3 to 4 months |
If you also struggle with kettle limescale from Thames Water, read our detailed guide on How to Descale a Kettle in London’s Hard Water.
Step 3: Managing the Built-In Water Softener & Dishwasher Salt
Every domestic dishwasher sold in the UK contains an integral water softening system built into the base of the cabinet. This system features a cartridge packed with microscopic amber-coloured beads made of ion-exchange resin. As incoming mains water flows through this resin chamber, the calcium (^{2+}$) and magnesium (^{2+}$) ions are attracted to the beads and captured, while harmless sodium ions (^+$) are released in their place. This ensures that the water entering the wash tub is truly soft ($< 50\text{ ppm}$), preventing limescale from forming on your heating element and dishes.
Over time, the resin beads become completely saturated with captured calcium ions and can no longer soften incoming water. This is where dishwasher salt enters the equation. During the regeneration cycle, the machine flushes a concentrated brine solution (water saturated with pure sodium chloride) through the resin bed. The high concentration of sodium strips the calcium ions away, flushing them out through the waste hose and leaving the resin beads charged and ready for the next wash.
Three Critical Dishwasher Salt Rules for UK Households:
- Never Use Table Salt or Cooking Salt: Table salt and sea salt contain fine grain sizes and anti-caking additives (such as sodium hexacyanoferrate or magnesium carbonate). In a dishwasher, these anti-caking compounds physically coat and destroy the microscopic pores of the ion-exchange resin beads, permanently ruining the softening chamber (£180+ repair). Always buy dedicated coarse Dishwasher Salt (usually costing roughly £1.50 to £2.00 for a 2kg bag at supermarkets like Sainsbury’s, Tesco, or Asda).
- Calibrate the Internal Water Hardness Dial: Most machines ship from the factory set to a moderate hardness level (Level 3 or 4). In London, where water hardness frequently exceeds 300 ppm, this setting is insufficient. Consult your machine’s manual to adjust the digital display (often by holding down the Start and Programme buttons on power-up) or turn the mechanical dial on the side of the tub up to Level 5 or Level 6.
- Always Top Up Immediately Before Running a Wash: When filling the salt reservoir in the floor of the machine using the provided funnel, salty brine water will spill out across the stainless steel floor. If this brine is left sitting on the metal between wash cycles, the concentrated chloride can cause pitting corrosion and pinhole leaks in the stainless steel tub. Always run an active wash cycle (even a 15-minute quick rinse) immediately after refilling salt to dilute and flush away any spillage.
Step 4: Running a Hot Acid Descaling Cycle
Even with a well-calibrated water softener, mineral scale and detergent residues gradually deposit onto the internal heating element, spray arm hubs, and pipework. Running an empty descaling cycle every 6 to 8 weeks strips away this calcification, restoring the heating element’s thermal transfer efficiency and saving on household electricity bills.
Option A: Food-Grade Citric Acid Crystals (The Gold Standard)
Food-grade powdered citric acid (available cheaply in bulk from hardware shops or online) is the preferred chemical descaler recommended by appliance engineers. It is an odourless, highly effective organic tricarboxylic acid that forms a soluble chelate complex with calcium ions, dissolving limescale rapidly without generating strong lingering smells.
- Ensure the dishwasher is completely empty of crockery, cutlery, and metal pots.
- Pour 150g to 200g of citric acid powder directly into the floor of the empty dishwasher tub. Add another tablespoon (roughly 20g) into the detergent dispenser flap.
- Select your machine’s hottest cycle—typically the Intensive 70°C or Pots & Pans 65°C programme.
- Allow the programme to run from start to finish without interruption. The combination of sustained 70°C water and dissolved citric acid will dissolve all internal chalk and purge the heating element.
Option B: Distilled White Pickling Vinegar (5% Acidity)
If you do not have citric acid powder on hand, distilled white vinegar (5% acetic acid) provides an effective household alternative.
- Do not pour vinegar directly into the sump, as modern dishwashers start every cycle with a 60-second drain pump purge that will immediately suck the vinegar down the drain before the wash water fills!
- Instead, fill a large upright ceramic mug or glass measuring jug with 500ml of white vinegar and place it securely on the centre of the top rack.
- Run the hottest intensive wash programme. As the wash cycle gets underway, the rotating spray arms will gradually splash the vinegar out of the mug, dispersing it into the recirculating hot wash water for maximum descaling contact time.
UK Safety Warning: Chemical Incompatibilities
NEVER combine vinegar or citric acid with chlorine bleach or Milton sterilising fluid inside a dishwasher. Mixing acids with hypochlorite bleach causes an immediate chemical reaction that releases toxic chlorine gas ($), which causes severe respiratory irritation, lung damage, and chemical burns in enclosed kitchen spaces. Furthermore, chlorine bleach is corrosive to internal stainless steel components and heating elements. If you use a bleach-based mould spray on the door seal, thoroughly wipe it away with clean water before starting any descaling cycle.
Step 5: Cleaning Door Gaskets, Seals & Detergent Dispensers
A frequently neglected area is the black rubber perimeter door gasket and the lower door hinge trough. Because the wash cycle water jets do not strike the outer door seals directly, food grease, detergent foam, and airborne spores settle into the folds of the rubber bellows. In London flats with poor ventilation or high humidity, this environment breeds dark fungal colonies of Aspergillus niger (black mould) and bacterial pink slime (Serratia marcescens).
- Wipe the Rubber Bellows: Mix 500ml of warm water with a teaspoon of washing-up liquid. Dip a microfibre cloth into the solution and carefully wipe along the rubber seal that lines the top and sides of the door aperture. Pull back the lip of the rubber gently to remove accumulated black sludge.
- Clear the Bottom Door Flap: Open the door fully flat and inspect the very bottom edge where the door hinges meet the tub floor. This narrow channel acts as a sediment trap for greasy hair, lint, and food slime. Wipe this trough clean with damp paper towels.
- Clean the Detergent Dispenser Catch: If powder or gel residue hardens inside the detergent dispenser pocket, the spring-loaded door can fail to flip open at the correct point during the cycle. Scrub the hinge spring and catch with an old toothbrush dipped in warm vinegar to remove dried residue.
If you notice similar mould issues in other appliances, see our guide on Why Your Washing Machine Smells Like Mould and How to Fix It.
Troubleshooting Common UK Hard-Water Dishwasher Problems
Before assuming your dishwasher has suffered an irrecoverable mechanical breakdown, review these common symptoms and their verified solutions:
1. Glasses Have a Cloudy White Haze That Won’t Wash Off
To determine whether your glassware is damaged permanently or merely chalky, perform the Vinegar Rub Test: dip a clean cloth into neat white vinegar and rub the cloudy glass firmly for 30 seconds. If the white film wipes away completely, leaving the crystal clear, your issue is limescale redeposition caused by an empty salt reservoir, an incorrectly set softener dial, or an unclosed salt cap. If the cloudiness remains and displays faint rainbow or opalescent colours under bright light, the glass has suffered irreversible etching—a microscopic erosion of the silicate glass structure caused by washing soft glasses with harsh alkaline detergent at excessively high water temperatures.
2. Error Code E24 / E25 on Bosch, Neff, or Siemens Appliances
On Bosch and Siemens group appliances, an E24 or E25 error code signals a drainage fault: the machine cannot pump out waste water within its programmed timeout limit. In 90% of household callouts, this is caused by a jammed drain pump impeller beneath the filter. Remove the filter, sponge out standing water, and locate the small plastic pump impeller cover held by a clip or single Torx screw on the left of the sump. Pop off this cover (wear rubber gloves!) and use your finger to spin the tiny white plastic pump impeller wheel. You will often feel a trapped fruit pip, chicken bone shard, or fragment of broken wine glass wedged tightly between the blades. Clear the debris, click the cover back firmly into place (the pump will not create suction if the cover is unclipped), and restart the cycle.
3. Sandy or Gritty Residue Left on Mugs and Cutlery
A fine, sand-like coating of food grit left on items after washing indicates that wash water is failing to circulate cleanly. The three main causes are: (1) spray-arm nozzles plugged with limescale chips, (2) the cylindrical sump filter not locked fully home, allowing recirculated dirty water to bypass the filtration system, or (3) stacking tall baking trays or dinner plates in the bottom rack on the left-hand side where they physically obstruct the upper spray arm from spinning.
4. The Detergent Tablet Does Not Dissolve Fully
Modern all-in-one tablets require consistent water temperatures and clear water jets to dissolve their polyvinyl alcohol (PVA) soluble coating. If you find a half-dissolved tablet clumped in the bottom of the tub or stuck in the dispenser, check: (1) whether a tall plate or chopping board in the front-left of the lower basket blocked the dispenser flap from springing open during pre-wash, (2) whether the upper spray arm nozzles that aim directly at the dispenser catch are clogged with limescale, or (3) whether your machine’s heating element is failing to warm the water (feel the metal interior 30 minutes into a 65°C cycle; if it remains ice-cold, the thermostat or heater has failed).
UK Tenant vs Landlord Responsibilities for Dishwashers
For tenants renting flats across Greater London, the legal demarcation between tenant maintenance duties and landlord repair liabilities is frequently misunderstood. Under Section 11 of the Landlord and Tenant Act 1985 and standard UK tenancy agreements:
- Tenant Responsibilities: The tenant is legally obligated to use appliances in a “tenant-like manner”. This explicitly includes regular day-to-day maintenance: cleaning the food filter, wiping door seals, unblocking clogged spray arm nozzles, and regularly topping up dishwasher salt and rinse aid. If an engineer is called out and diagnoses that the pump seized because the filter had never been cleaned or an unaddressed glass shard jammed the impeller, the landlord has the legal right to pass the callout invoice (£90–£180) directly to the tenant.
- Landlord Responsibilities: The landlord is responsible for repairing or replacing the appliance when failure results from fair wear and tear, internal electrical faults, control board breakdown, motor bearing failure, or heating element burnout caused by long-term age. If you rent in a hard-water area, keep purchase receipts for dishwasher salt and descaling products to prove that you have maintained the machine responsibly should a dispute arise.
For an exhaustive breakdown of tenant legal rights and repair guidelines, read our guide on UK Tenant vs Landlord Repair Responsibilities.
Frequently Asked Questions
Can I use regular table salt or sea salt in my UK dishwasher?
No, absolutely not. Table salt, sea salt, and rock salt contain fine culinary grain sizes and anti-caking additives (such as sodium ferrocyanide or magnesium carbonate) designed to prevent clumping in damp kitchen air. In a dishwasher, these anti-caking compounds coat and destroy the microscopic synthetic resin beads inside the ion-exchange softening chamber. Once the resin is fouled, the water softener will never regenerate, leading to permanent hard-water staining and chalk deposits across your appliance. Always purchase dedicated coarse dishwasher salt consisting of pure 99.9% sodium chloride.
How do I know if the white film on my glasses is limescale or permanent glass etching?
Apply neat white vinegar or lemon juice to a clean microfibre cloth and rub the cloudy glassware firmly for 30 seconds. If the cloudiness vanishes and the glass becomes crystal clear, the deposit is surface limescale (calcium carbonate) caused by inadequate dishwasher salt, hard water, or an uncalibrated softener dial. If the cloudy haze remains unchanged, the glass has suffered irreversible etching—a physical erosion of the glass matrix caused by using overly aggressive detergents or excessively hot programmes with water that is too soft.
How often should I clean the dishwasher filter in a London flat?
In a London household running the dishwasher four to seven times per week, the cylindrical filter should be removed and rinsed every fortnight. London’s hard water causes cooking grease and mineral salts to combine into a dense waxy residue that coats the fine nylon mesh far more rapidly than in soft-water regions like Scotland or Manchester. A quick two-minute rinse under warm running water with a soft nylon brush will prevent stagnant odours and maintain proper drainage pressure.
Will white vinegar damage the rubber seals in my dishwasher?
When used occasionally in a descaling cycle (e.g. 500ml placed in a glass bowl on the top rack once every two months), 5% distilled white vinegar is heavily diluted by the 10 to 15 litres of water circulating inside the tub. At this dilution ratio ($< 5\%$), it poses no risk to modern synthetic EPDM rubber door gaskets or fluoroelastomer pump seals. However, you should never soak rubber gaskets in undiluted vinegar for days on end, nor should you use industrial-strength 20% horticultural cleaning vinegar.
Does using “All-in-One” dishwasher tablets mean I can skip dishwasher salt?
No. While all-in-one tablets contain chemical water-softening agents (such as polycarboxylates and phosphonates) that help prevent scale from depositing onto dishes during that specific wash, they cannot regenerate the dishwasher’s internal ion-exchange softening resin. In hard-water areas where tap water exceeds 250 ppm CaCO3 (all of London and the South East), the water-softening additives in tablets are overwhelmed. You must continue filling the dishwasher salt reservoir to keep the machine’s internal resin tank functional.
Why is there dirty standing water in the bottom of my dishwasher after a cycle?
A shallow puddle of standing water in the bottom of the tub indicates a drainage obstruction. The most common causes are: (1) a blocked cylindrical sump filter, (2) a foreign object (such as a broken glass shard, cherry pip, or bread-bag clip) jammed in the drain pump impeller beneath the filter cover, or (3) a kinked drain hose where the dishwasher waste pipe loops underneath your kitchen sink trap. Clear the filter and inspect the impeller before calling an appliance engineer.
Is it cheaper to run the dishwasher on Eco 50°C or Quick 30-minute wash?
Counter-intuitively, the Eco 50°C programme is significantly cheaper to run, despite taking 3 to 4 hours to complete. Roughly 85% to 90% of the electricity used by a dishwasher is consumed by heating the cold incoming water. The Eco cycle heats water slowly to a modest 50°C and relies on prolonged soak time for detergent enzymes to break down food grease, consuming approximately 0.7 to 0.9 kWh per cycle (roughly £0.18 to £0.24 under current UK electricity tariffs). Quick 30-minute cycles heat water rapidly with the heating element running continuously, often consuming 1.2 to 1.4 kWh (roughly £0.32 to £0.38 per wash).
About Harry Bennett
Harry is the editorial lead at London Homecare, researching practical home maintenance, damp prevention, laundry care, and energy-saving solutions tailored to UK flats, terraced houses, and British weather conditions.